Article
Sepia
  |
Sepia prints are
monochrome
 prints that are in brown and white.
Historically they were produced for two
reasons, the process of toning was more stable and images lasted longer than
other methods available at the time, and it brings out more midtones and
detail than could be seen in the black and white prints at the time. prints that are in brown and white.
Historically they were produced for two
reasons, the process of toning was more stable and images lasted longer than
other methods available at the time, and it brings out more midtones and
detail than could be seen in the black and white prints at the time.
This was originally done from the 1880's by
adding a pigment called 'sepia' made from the Sepia Officinalis Cuttlefish found in the English Channel.
Then processes were developed that
replaced the metallic silver in the emulsion with a silver compound such as
silver sulphide. A range of processes were available over time including
Selenium toning, Sepia toning, metal replacement toning and dye toning.
Far later, up to the digital era, sepia prints
were made by selecting photographic paper that produced this effect, rather
than by toning, and this method is available now to those still using a film,
negative and wet darkroom process.
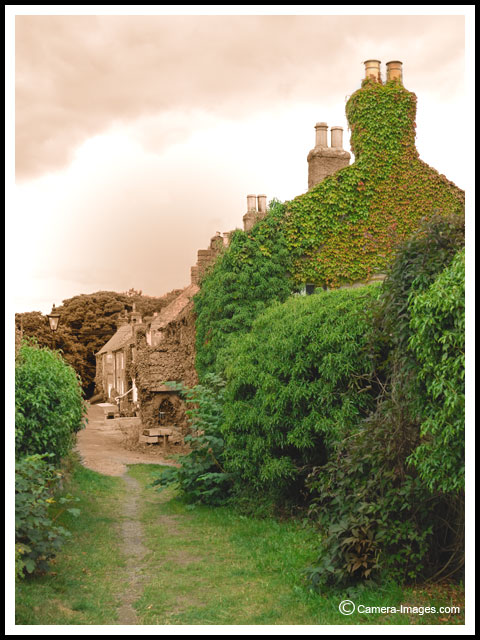
Digital Sepia Images
Today sepia prints can be produced in camera or by
editing, and are used to produce a warmer monochrome image that shows the full
range of image tones well. They can be very attractive prints. A range
of other colours and tones of each are now available.
These also open up artistic possibilities, and
are also sometimes used as a light print in the background as an alternative
to a watermark. |
In some editing software, the facility provided
to produce sepia images is a simplified application of the
Duotone
process also available, while with some cheaper software it's a
conversion to black and white and then a colour shift. You will find you get
different results by different combinations of the processes available in
editing software.
I personally prefer the results produced by
Nikon Capture NX2,
converting to black and white, which allows me to use digital filters
to produce a
monochrome
image and then convert this to a sepia image. A series of images I produced
representing 'pathways through time' did this and had this applied to part of
the image while the other part was left in colour, as shown in the image
below.
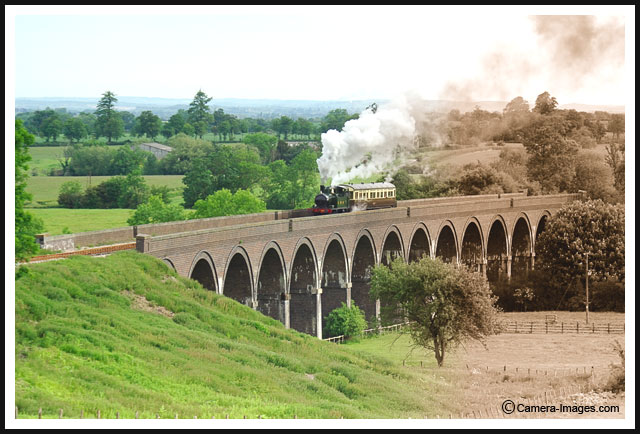
A variation of this used a
digital graduated filter to apply this technique allowing the photo of a steam train to
go from colour at one side to sepia at the other.
 |
|
Out of the Past
- The image shows the first time a steam train passed over a viaduct
for many years after restoration of the line, and has been edited so
that it appears that the train is coming out of an old image into the
current age. |
Many better digital cameras have the ability
to produce
monochrome
images, often with a range of colours and tones within each. You can often
combine this with digital
monochrome effect filters,
or you could use filters on the lens, allowing you in either case to see the
results when taken, rather than engineer the results later in editing. With
Nikon images if you capture these images as Raw images you can later
select to make changes including reverting to the normal colour image.
 |
 |
 |
From the digital camera
Some cameras have an ability to take
tinted monochromes. These 3 examples were taken with a Nikon D300, other
colours and tones of each are available.
This is a series of photos using
different camera settings not the same image.
Above left - Black and White digital
filter used
Above right - Sepia digital filter used
Left - blue tint (mimicking a
Cyanotype
)
|
See Also:
Creating Vintage Images - Old Look Photos
Monochrome
Duotone
Cyanotype
Soft
images
Vignetting
|