| Home | Newsletter | Locations | Diary |
|
Indexes |
|
|
|
Article Cleaning A Sensor FilterIf you have a Nikon D300 or D60 then first use
the inbuilt means of sensor cleaning before looking at using the methods below,
click here
In this article we want to look at how to clean the sensor filter, to remove dust that has built up. It is a filter in front of the sensor not the sensor itself that we are going to look to clean. This filter is fragile and we have to be careful what we do so as not to mark it, however others that offer cleaning services have no other options than we do and there is no reason why you or I should damage it over anyone else. To determine where the dust is and to also
check after that we have successfully removed it, read the
article on this. There are special brushes and other items and we will explain these below, as well as telling you where you can get them from, but first lets look at how to get to and see the filter. Getting at the sensor filter On the setup menu of all Nikon DSLR cameras you will see an item that’s says either ‘lock mirror up for cleaning’ or ‘mirror lock up’ when you select this, and follow the instructions the cameras mirror is locked up and shutter is open, allowing you to see and clean the sensor filter. Turning the camera off returns everything to its normal position. The cameras will only allow you to do this if the battery has a reasonable amount of power, something like 75% left. This is a precaution so that you cannot run out of power in the middle, as then the shutter would attempt to close and would most likely be wrecked by the implements you were using. With some older cameras like the D100 and D70 that has not had a software upgrade, and older models you need to have a plug in power supply to undertake this task, it won't work on battery alone with these models. When opening the camera to view the sensor filter, ideally do it with the camera looking at you rather than upwards, so nothing can drop in. You won't realise how much hair you are shedding until you lean over a camera that is pointing upwards, and then discover your cleaning task has become much more difficult. If you have to have it pointing upwards than work with it under a piece of glass or a hobbyist magnifier so that its I protected from falling dust and hair. You will find that with normal eyesight looking into a dark space its rather difficult to see, and to spot minute pieces of dust near impossible. There are a number of choices here, you can:-
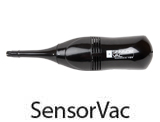
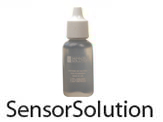
Removing dust Nikon, in many of their manuals, suggest using a blower brush, this we have never had any success with, for two reasons, dust is held on by an electrostatic charge, and when you blow far harder it just stirs up far more dust and more of it ends up on the sensor. Lets start by sharing with you some of our experiences in this area. Early on when we had the D100, D70 and D2H, we took them back to Nikon to be cleaned, this involved a day out, and a lot of hanging about. At this time they did not charge for the cleaning service and did it in house. On a later trip with one camera they had switched over to sending it out to a contractor so we just had to hand in the camera and it was returned by post or carrier several days later. In this case the routine of transferring it back had moved more dust so we were no further forward, and as it was a camera with a removable focusing screen we now had dust up between the dust and prism as well. This therefore for us was no longer a workable solution and we had to find an alternative. This was at a point before all the options we have today were available, After careful research and experimentation, including some situations where we added more dust than we took out, we settled on a method that was reliable and safe, although time consuming, we have now faster methods to achieve this, but I will explain it. We used a large magnifying lamp arrangement on a springy arm used by model makers, this allowed us to see in and the magnifier provided a level of protection to other bits falling it. We obtained a kit to attach to a vacuum cleaner that was designed for cleaning computer keyboards, this gave us small tools that had suction to remove dust. As we were concerned about the brushes being two hard for the filers, we put over this a piece of micro fibre cloth that came with a pair of glasses. It was time consuming, but worked great, at last we had a means to clean up the filter without taking a day out to get it done. We still have this setup as a a reserve but don’t use it now. What we use now is a kit that we bought just over a year ago, produced by Delkin, the Senorscope System. This has a case containing a device for carrying out inspections, a small vacuum, brush attachments, battery box, and some special liquid and double ended, double sided paddles. The vacuum unit has a switch that allows it to boost the power and has a light that allows you to see where it is pointing. The brush attachment is soft enough not to damage the filter. The vacuum will also run off a USB connection from a computer, instead of the battery box. The inspection device is a magnifier and has a built in light. You can hold this against the camera and putting your eye to or near it, press the switch illuminating the inside. We still use the method we have
explained on another page
With our own camera this has been all we have had to do, but in some cases where clients come in for training and they have managed to get a build up or something else in there, we have needed to use paddles and cleaning fluid. To use these we put a spot of liquid on one end and take it across the sensor, then turn it over to use the other moist end twice through again, so as to cover the whole sensor area. Flipping the paddle to use the other end we can use the two dry sides to repeat the process taking of any excess liquid, although it evaporates. Occasionally we have had to repeat the process.
The kit we use, is available from Delkin Europe
see
http://www.delkin.com/store/uk/product.php?productid=321&cat=75&page=1
The Delkin - Sensorscope System (in pictures)
See also other related DSLR and Dust articles by taking each of these links:
|
||||||||
|
||||||||
| . | ||||||||
|
||||||||
|
|
)