| Home | Newsletter | Locations | Diary |
|
Indexes |
|
|
|
Article 3D Photography TypesIntroduction This article is one of many on 3D
photography, the best starting point for this set of articles is
3D
Photography - An Introduction, In an area where technology is developing it is likely that the range of methods in use will increase, and just around the corner we know a number of 3D TV's are to become available, plus some optical companies are now producing stylish 3D glasses, with some looking at contact lenses that could be permanently worn and used to see some developing types of 3D projection. This article covers what is available now, and we will try to update it as we identify how any new technologies work. All the methods covered below can be used from the same source images, so if you have two images, taken on a single camera or two linked cameras, then you can with the right software or equipment use any of the methods below. Some software will produce several versions at the click of a button. All methods allow images in 3D to be in colour and in black and white. Types or Methods of Producing and Presenting 3D While many will think of Anagraph images, where you wear a pair of glasses with a red and cyan lens, there are a wide range of methods to produce a 3D effect, in this article I want, very briefly, to explain the options. I have broken it into two groups, those that use two coloured glasses and the others that do not, covering these first, and then the 2 colour glasses approach. Those currently available that do not use the two coloured glasses are:- Two Images Side by Side The earliest method was to have a hand viewer that contained two lenses, a dividing card and two images. The children stereo viewers that had a circular film strip presentation used the same effect. You can also get a number of small viewers, including some that fold up, that can be used with prints or computer screens. The limitation is that in most cases only one person at a time can see the image.
Side by Side Pair Crossover Images Similar to the above but the images have been swapped over and you then have to have the ability to look cross-eyed at them in order to see the image. Some like this as it requires no viewing equipment at all. The technique is to look at a point of a pencil and move it closer to you, so that your field of vision crosses, then to focus on the images. This is very much an acquired skill and although most people can manage it if they persevere, its not something that the population at large will ever undertake. You still have images that are only viewed by one person at a time.
Crossover pair Shutter Glasses Used with some computer games and some early attempts to produce 3D TV, this method works by showing the images alternately for the left and right eyes. The glasses are synchronized to this and open and close the vision of the images to the eyes in turn. The advantage is that there is no change in colour and it can be used with relatively standard equipment. The limitation is that any eye sees only for half the time so images can have a bigger step between frames making some situations look like an early movie, a bit jerky. The images cannot be printed. Goggles with two small screens More often used in simulations and cases where there are higher budgets, the user wears a pair of goggles that allows each eye to look at a small inbuilt screen using lenses to correct the vision. This gives the most realistic of all 3D moving images, some even allowing you to move and the images to represent the direction and angle you are looking. Some people however don't like not being able to see the world around them, and the systems can get hot, are often fairly heavy to wear and are expensive. Images can only be seen by those wearing the goggles. The images cannot be printed. Polarised Projection/Glasses This is the method used in cinemas, you see an image that has been projected by two projectors, each with a polarising filter in front, one set vertical and one horizontal. The glasses worn could match one filter vertical and one horizontal. In practice as far as I know only one projecting system does this, the rest using a V or X diagonal arrangement. The advantage of the polarised method is that a number of people can look at the same image and there is no change in the colours involved. Polarised projection needs to be done on a silver screen, white will not work, and not all silver ones will either so its a bit more complex to arrange. It needs to reflect polarised light without creating scatter in other directions. Lenticular silver screens are particularly good at preserving the polarisation of the projected light. The major limitation is that you cannot print the image, so its only generally suitable for projection. Lenticular Images
Lenticular images usually require a larger number of images and are printed, and sandwiched behind a special lens
sheet. The resulting image appears 3D but can also allow you to see either a
different image or series of images as you move about, so for example you
could come into a room and as you walk down the room the portraits could
turn their heads to follow you. I have a number of these that are
quite striking. You don't need any special glasses to view them. See more in
the article
Lenticular Images.
Fujifilm Digital Camera System A
digital camera that takes two images has been produced by Fujifilm, known as
the Finepix Real 3DW1, this a 10MP point and shoot camera that has two
lenses in a single unit. It has a 3 times optical zoom. Price is
around £394-£479. This is a different system creating a single 3D image that
is displayed on the camera back or on special picture frames. See
Park Cameras
Heavily promoted when it came out, mid 2009, as the worlds first digital 3D camera, its not, there are a number and I had lenticular prints at the end of 2008 taken off one camera that is made up in effect of a number of Canon cameras in a composite box. It may be the first aimed at the point and shoot market. Two Coloured Lenses/Glasses All of these systems have the advantage of cheap deployment, while they need special glasses and usually will not work with people who are colour blind, a far higher percentage of the population than you initially expect.
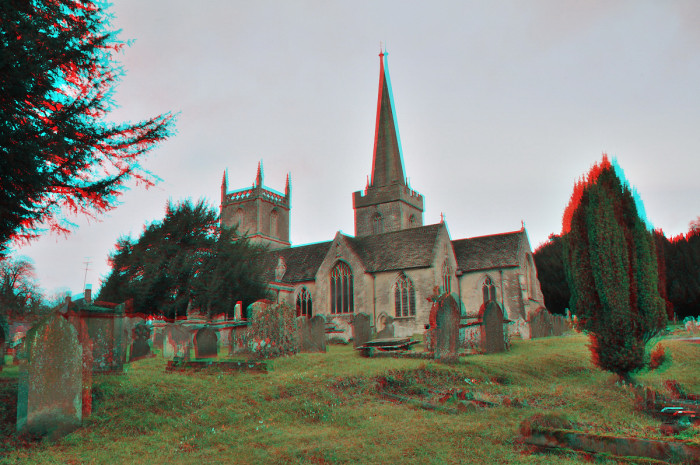
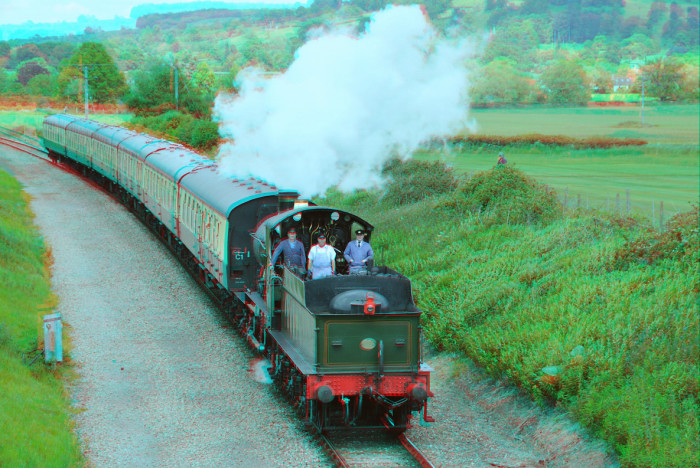
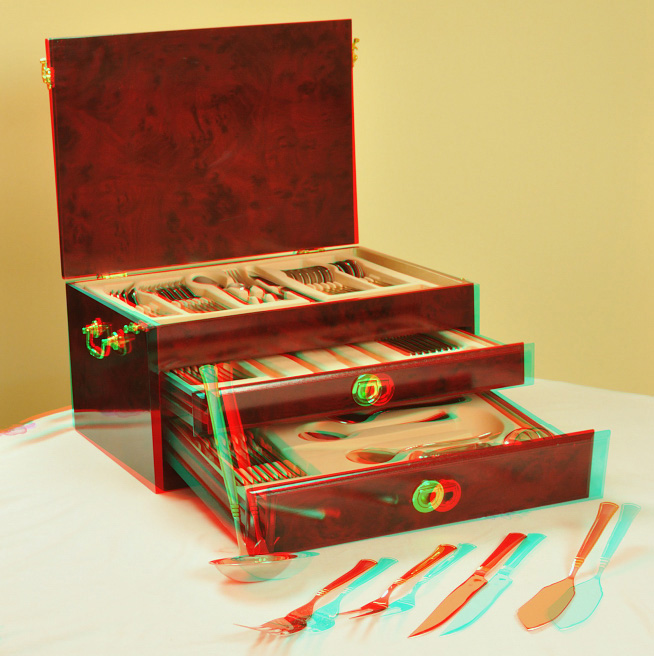
Anagraph/Anachrome Method Some call this method Anagraph, others Anachrome, they are the same.
Similar to the polarised
idea but images can be shown on any TV or computer, or used with any screen,
or even be printed. To project you only need a single projector. The image is
put together by superimposing two images, one from the position of each eye,
and one having a bias of one colour and the second with a separate colour.
When you see these images without glasses, you see coloured halos one side
or the other in the two colours used where the image from the two eyes do
not line up exactly. Looking through glasses with the filters, to filter out
this effect, you see the image presented to each eye. As images can be
printed, its possible to make wide use of this and the coloured glasses cost
only pence to produce. The disadvantage is that some of the colours
may not show fully or some may have a flashing effect when used with the
glasses. There are a number of combinations of colours, and selecting a
different set may help, as well as making the images visible fully only to
those who have the right set of glasses to go with the images, ColorCode
(below) is one example. The usual colours used tends to be red
and cyan (bluey/green), and this has become more the standard of most 3D material on
the internet. Some people say that now 80% of computer users have a set of
red and cyan (blue/green) 3D glasses, and these have been given away with video hire,
with some games and are available online at a very low cost, coming in many
styles including cheap cardboard and several plastic designs, including
versions that clip onto glasses for wearers of glasses/spectacles. Red is on your left
eye. You can also make a set very easily, see our
Project - Making 3D Anachrome
Glasses.
Details on taking these images are included in
Taking
3D Images with One Camera Pantograms Pantograms are a variation on the Anagraph, but instead of the image coming out of the screen you can print it onto paper and the images are designed to do that, when you look at it on the desk using the coloured glasses, the item appears to be sat up in 3D on the desk. ColorCode Towards the end of 2009 Channel 4 broadcast a number or programmes including some historic sequences, a magic show and several full films in 3D, using this method, but using a combination of dark blue and amber glasses that were given away in Sainsbury's stores. This is another form of Anagraph but marketed by one company. Both software to convert to this and special glasses are available. See also
3D ColorCode
ChromaDepth and Cyberholographic Standard This is a system with a single photo or film that to the normal viewer appears normal, the glasses appear near transparent. This technique sorts colours out so that some appear forward of others, red being the closest and others going back in the order of the rainbow. There are two types of glasses. I don't think there are any photographic applications for this, its more useful in graphics applications. You could for example produce a drawn cartoon comic in 3D with this. See Also
our
3D Section
|
||||||
|
||||||
| . | ||||||
|
||||||
|
|